Custom Bag Tags: A Practical Playbook From First Sketch To Full Rollout

Airports, arenas, and campuses are built for motion! On a busy day, small objects can either help teams glide or slow them down. Custom bag tags land in the first group when they are legible at a distance, rugged in transit, and simple to personalize. This guide turns real lessons into a program you can hand to your design, purchasing, or event operations teams.
What Makes a Custom Bag Tag Work
A bag tag serves multiple purposes: It helps the owner spot a bag in motion, it endures rough handling without losing clarity, and it tells a finder exactly what to do.
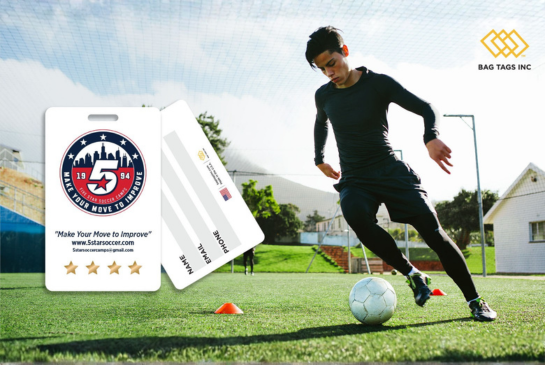
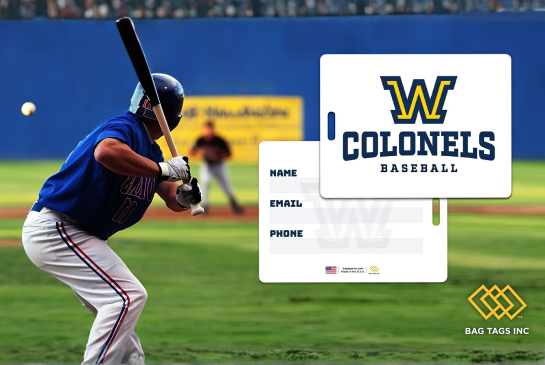
For events, a well-designed tag also becomes a small keepsake that cements the day or experience. You can also personalize tags with variable data, which is ideal for teams, clubs, and group orders.
Those outcomes depend on choices you control: plastic finish, loop type, type hierarchy, color contrast, and a clean QR that leads to a fast-loading page. When those choices reinforce each other, the tag performs consistently month after month.
Budget follows the same logic. Spending a little more on the right loop and a finish that suits your lighting conditions lowers the need to pile on your bag tags with custom add-ons later.
Design for Distance, Light, and Motion
Treat your tag layout like a safety sign that still looks good! Build a simple hierarchy with a dominant name line, a secondary line for city and country or role, and a protected space for a QR code.
Test the design the way you and others will encounter it out and about in the world. Print a proof at size, stand under bright overhead light, and glance at it at arm’s length. If you struggle to read it, increase the type size, tighten letter spacing, and raise contrast.
When brand color is nonnegotiable, frame it with a contrasting field so letters still stay legible under LEDs or sunlight.
If your program requires brand visibility, keep it purposeful. Custom bag tags with a logo perform best when the mark is sized for readability without crowding the name line. A subtly confident placement looks more professional than a logo that overwhelms the functional text.
Hardware that Matches the Job
- Clear plastic loops: Fast to apply in large batches, ideal for backpacks, duffels, and day bags that stay with the owner.
- Premium stainless steel loops: The durable option for checked luggage, hard cases, exhibit road kits, and shared equipment that rides conveyors or trucks.
- Rounded corners and clean drill holes: Reduce snags, protect printed edges, and keep tags tidy longer.
Information Density and Privacy
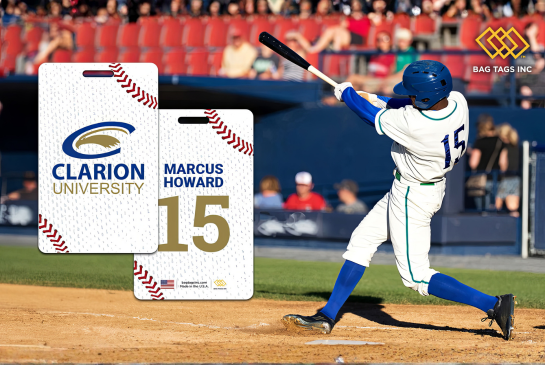
More lines do not necessarily equal better outcomes! For most programs, a first name and last initial on the front, plus city and country, is enough for quick recognition.
On the back, a single contact method and a short message should prompt the necessary action without exposing unnecessary personal details of the bag’s owner. That is why a QR code that opens a simple recovery page is ideal for this!
An Artwork Workflow that Minimizes Revisions
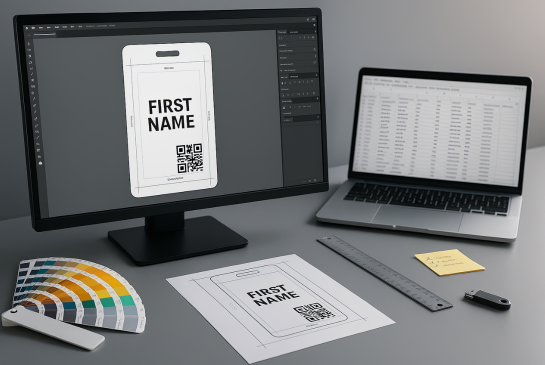
Systematize the handoff so proofs are quick and reorders are painless. Our free templates and guides are a useful resource to help you get the design of your bag tag with custom elements right the first time.
- Start from the correct die line: Use the exact file from the linked page above to avoid scaling or margin errors. Make sure your file’s resolution is set to 300 DPI and CMYK color mode for maximum clarity when printing.
- Fix the design rules: Lock logo position, type sizes, and QR placement before personalization. This is where teams often ask for customized bag tags, which means preapproved color or layout variants governed by one master.
- Prepare production-ready files: Outline fonts, embed assets, keep strokes above 0.25 pt, and export vector PDFs. Include Pantone values if your brand requires precise color targets.
- Clean variable data: Use a CSV with columns for FirstName, LastName, Role, City, Country, and an optional CodeURL. Consistency here eliminates manual fixes.
Finish, Color, and Contrast
Plastic works well with vibrant color and crisp black, but lighting is also an important factor that determines what people actually see.
Glossy fronts offer rich color and wipe clean quickly, which better suits gifting and executive presentation. Matte finish reduces glare under bright light, which favors operations where speed matters more than sheen.
When you split a program by audience, we suggest pairing glossy with recognition kits and matte with working crews. Make sure to place the QR on a solid, high-contrast field that resists smudges and still scans after multiple trips.
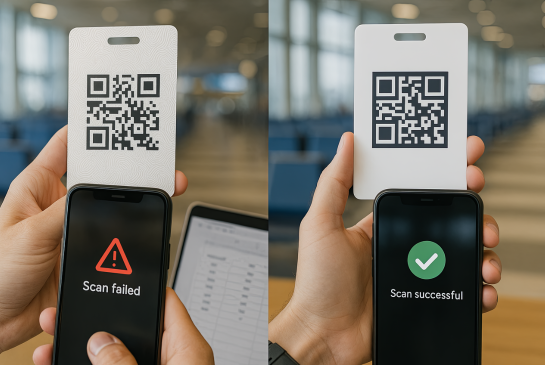
Why QR Codes Can Save Your Bag
A QR code turns a bag tag into a fast, universal path back to the owner. It can also route people to your website or highlight a title sponsor for an event.
Scanning needs to feel obvious. Give the code clear space, size it larger than you think you need, and test on multiple phones at arm’s length.
The landing page should be able to load fast on patchy airport Wi-Fi and show only one call-to-action. If you want to collect more details, send a follow-up email rather than making someone load a long form on their phone in a noisy terminal.
Personalization Patterns for Different Teams
While orientation kits, event crews, and onboarding boxes share constraints, but each benefits from a different emphasis. Choosing customizable bag tags lets you keep one master layout while varying colors, roles, and labels for each cohort.
- Students rarely need roles, so lead with their name and a school mark.
- Staff and volunteers move faster when the role line reads at a glance backstage.
- For new hires, name and city keep the tag useful in the office and on the road.
When stakeholders want flexibility without a redesign, work inside one master file. Keep a single layout and allow preapproved color or label changes between print runs.
Use Cases and Field-Tested Tactics
Below are practical, repeatable ways for getting real results from high-contrast, QR-enabled bag tags. Each use case specifies what to print, which finish to choose, and where the QR should point so crews move faster and errors are minimized.
Live Events
Events such as conventions and tradeshows run on a stable flow behind the scenes. If every hard case looks the same, crews lose minutes at load in and load out - these lost minutes add up. High-contrast tags fix this without turning setup into an all-out arts and crafts project.
Give staff matte tag finishes for glare control under exhibit lighting and reserve glossy for VIPs or speaker kits where visual pop matters more. Point the QR to a concise concierge page with return instructions and a contact method for the onsite manager.
Here’s a couple ways to make your live event run more smoothly with custom bag tags:
- Pair tags with registration packets to prevent bottlenecks at badge tables.
- Order custom bag tags in bulk with a 10% buffer to cover late registrants and last-minute crew adds.
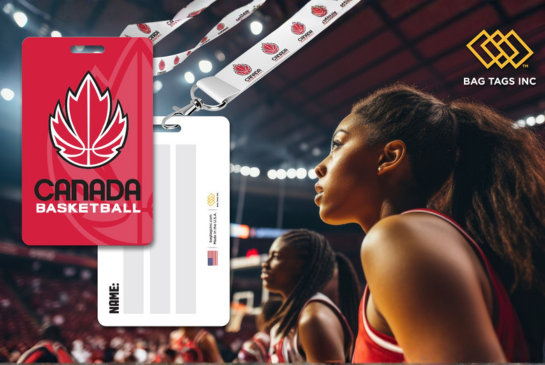
Education
School events and universities on move-in / move-out days require quick recognition. Issuing tags at orientation helps new students and families spot bins and duffels, while housing staff can sort gear faster.
Athletics and clubs can use the same visual system with a switch in loop type and finish. Durable plastic tags with stainless loops hold up to bus bins and away games, while clear plastic loops are perfect for campus backpacks.
A couple tips to help you standardize across departments so reorders remain simple:
- Use color-blocked fronts by program so groups can sort at a glance.
- Route QR codes to a recovery form that emails housing and the student.

How to Control Quality Before Production and at Receipt
Three short checks catch the problems that typically slip into the field.
- Readability under bright light: Hold at arm’s length. If the name strains the eye, raise contrast or type size.
- QR scan with glare and smudges: Codes in perfect mockups often fail in real life. Test on multiple phones after wiping and after a few fingerprints.
- Loop stress and twist: Tug and twist both loop types. Stainless is the right answer for checked luggage and hard cases; clear plastic is fine for owner-handled bags.
When the shipment arrives, spot-check randomly across cartons for color consistency, laminate quality, hole cleanliness, and loop thread quality. Scan a handful of QR codes against the live landing page to confirm they work.
Sustainability, storage, and reusability
Durability does the most work here. Tags that last several seasons reduce the need for replacements and re-shipments. Store extras in a cool, dry place and group by department or cohort so coordinators can move quickly. If you keep traveling event kits, include a small bundle of spare clear plastic loops in each case so onsite staff can swap a damaged loop without needing a whole new shipment.
Data Hygiene and Proof Discipline
Messy personalization breaks the flow of your tag printing program. We recommend standardizing the casing for names, spelling out roles, and normalizing city and country fields.
It’s also a good idea to pay attention to any long names so that they fit without dropping below your minimum type size. We suggest approving one digital proof for layout and one physical proof for material, finish, and loop type.
After that, treat reorders as controlled runs that change only variable fields. This prevents design drift and keeps outputs predictable month after month.
Common Pitfalls and Easy Fixes
-
Low-contrast art that disappears under LEDs
Fix: raise contrast or move to matte fronts for working crews. If examples help, point to the finish photos on the Luggage Tag product page.
-
QR placed on complex backgrounds
Fix: place it on a solid, high-contrast patch with enough white space. Use the safe zone found on our Templates and Guides page.
-
Distribution chaos at handout time
Fix: pack alphabetically with divider cards and a printed pick list. For events, mirror the packing method in Conventions and tradeshows so volunteers stay fast.
Use This Procurement Checklist
- Confirm audience, environments, live dates, and owners.
- Choose plastic finish and loop type to match stress level.
- Approve a master layout with fixed logo, type sizes, and QR placement.
- Prepare a clean CSV with final names and fields.
- Request proofs and, if time allows, run a small pilot.
- Approve production and confirm shipping windows with buffers.
- On receipt, spot-check color, print clarity, and loop strength.
- Store extras by cohort and document the reorder rhythm.
In Closing
Treat your tag program like a working system. Pick the finish and loop for the environment, lock a master layout, keep the CSV clean, pilot and proof before you scale, then spot-check on arrival.
With those habits in place, you get legible, durable tags that reduce mix-ups at carousels, move-in days, and show floors.
When teams need details, send them to the product gallery, template files, and the event and education resources linked throughout this article. Keep the design evergreen, set a steady reorder rhythm, and let each trip confirm the tag is doing its job.